Creating Invoices
Learn how to create professional invoices in minutes. This comprehensive guide walks you through every step of the invoice creation process.
Getting Started
Creating your first invoice is simple and straightforward. Before you begin, make sure you have:
- A verified account with Freelance Trackr
- At least one client added to your account
- Your business information and branding set up
- A clear list of items or services to invoice
💡 Pro Tip
Set up your branding and payment details before creating invoices. This information will be automatically included in all your invoices, saving you time!
Quick Start Steps:
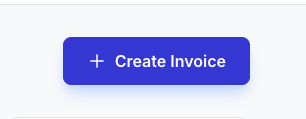
- 1Navigate to the Invoices page from your dashboard
- 2Click the "New Invoice" button in the top right corner
- 3Fill in the invoice details following the steps below
Invoice Details
The invoice details section contains essential information that identifies your invoice and sets payment expectations.
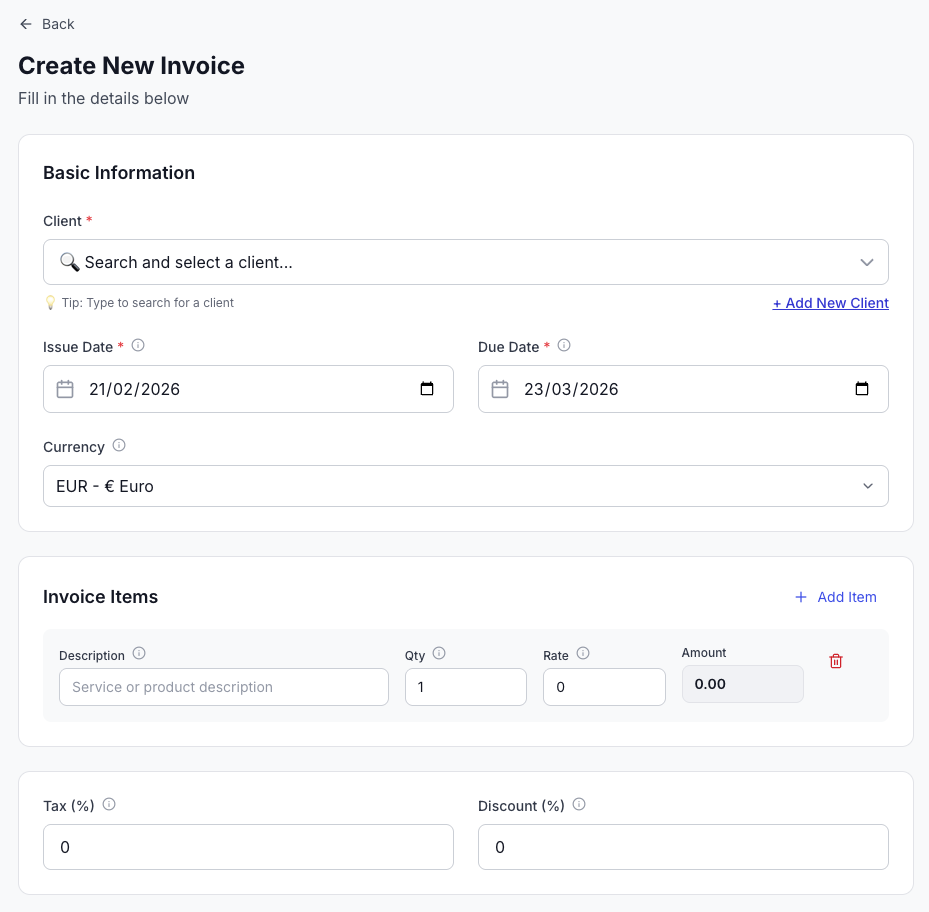
Select Client
Choose the client you're invoicing from your client list. Their contact information will be automatically populated.
Note: If your client isn't in the list, click "Add New Client" to create their profile first.
Issue Date
The date when the invoice is created. This is typically today's date and is automatically set, but you can change it if needed.
Due Date
The date by which payment is expected. Common payment terms include:
- Net 7: Payment due within 7 days
- Net 15: Payment due within 15 days
- Net 30: Payment due within 30 days (most common)
- Due on Receipt: Payment due immediately
Currency
Select the currency for your invoice. Freelance Trackr supports multiple currencies including USD, EUR, GBP, NGN, GHS, and more.
Adding Items
Items are the products or services you're billing for. Each item includes a description, quantity, and rate.
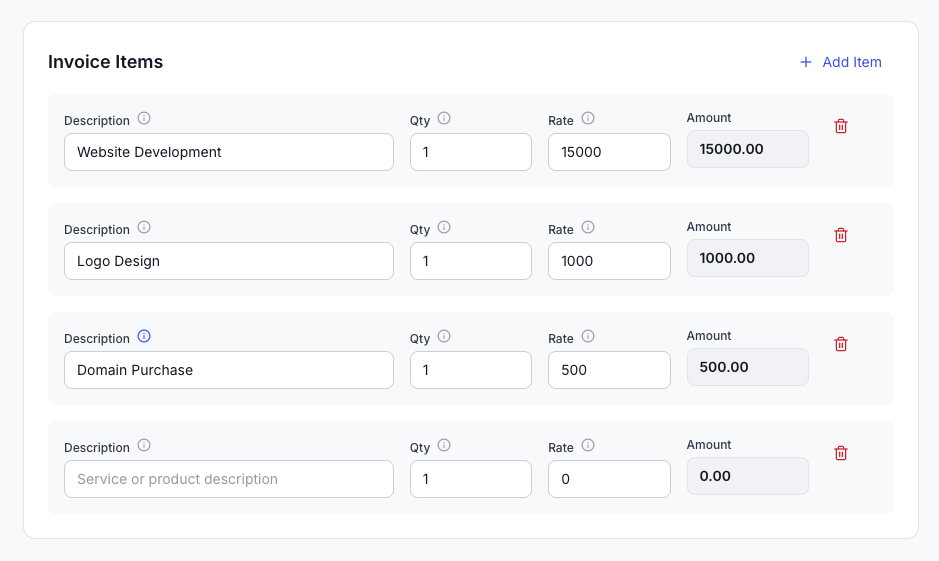
Item Description
A clear description of the product or service. Be specific so your client knows exactly what they're paying for.
Examples:
- • Website Design - Homepage Redesign
- • Content Writing - 5 Blog Posts (1000 words each)
- • Consulting - Project Management (March 2025)
- • Logo Design - 3 Concepts + Revisions
Quantity
The number of units you're billing for. This could be hours, days, items, or any other unit of measurement.
Rate
The price per unit. This is automatically multiplied by the quantity to calculate the line item amount.
💡 Adding Multiple Items
Click "Add Item" to include multiple products or services on a single invoice. The subtotal will be calculated automatically.
You can also remove items by clicking the trash icon next to each line item.
Tax & Discounts
Apply taxes and discounts to adjust the final invoice amount.
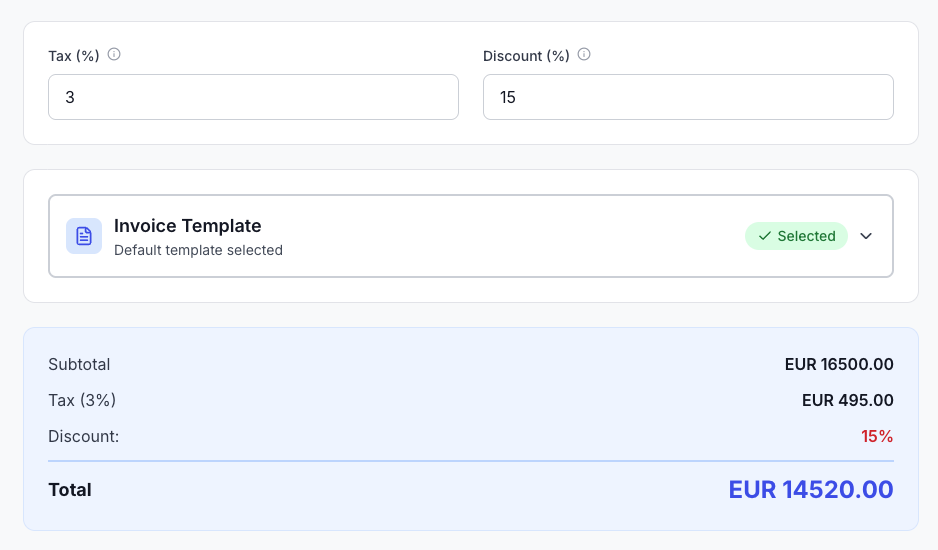
Tax (Percentage)
Enter the tax percentage to apply to the subtotal. Common tax rates include:
- VAT (Value Added Tax): Varies by country (15-25%)
- Sales Tax: Varies by state/region (5-10%)
- GST (Goods and Services Tax): Typically 5-15%
Important: Make sure you're charging the correct tax rate for your region and type of service. Consult with a tax professional if unsure.
Discount (Amount)
Enter a fixed discount amount to subtract from the subtotal. Use discounts for:
- Early payment incentives
- Bulk order discounts
- Promotional offers
- Loyalty rewards
Calculation Order:
- 1. Subtotal: Sum of all items
- 2. Tax: Calculated on subtotal (subtotal × tax%)
- 3. Discount: Subtracted from (subtotal + tax)
- 4. Total: Final amount due
Choosing Templates
Select a professional template that matches your brand style. Freelance Trackr offers 6 beautiful templates.
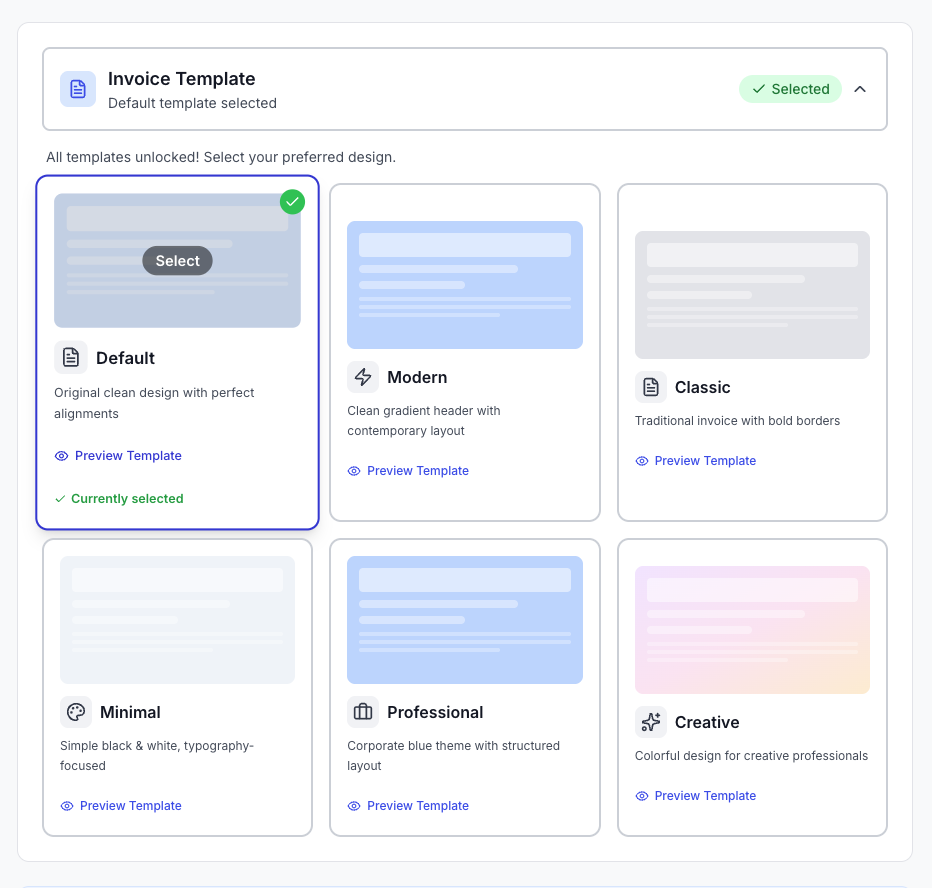
Default Template
Clean and professional design suitable for all industries.
Free PlanModern Template
Contemporary design with bold typography and clean lines.
Supporter+Classic Template
Traditional business style with elegant formatting.
Supporter+Minimal Template
Simple and uncluttered design focusing on content.
Supporter+Professional Template
Sophisticated design for corporate clients.
Supporter+Creative Template
Vibrant design with gradients for creative professionals.
Champion Only💡 Template Preview
Click on any template to preview how your invoice will look before saving. You can switch templates anytime while editing an invoice.
Custom Branding
Personalize your invoices with your brand colors, logo, and company information. This makes your invoices look more professional and strengthens your brand identity.
📸 Branding section showing: Logo upload area with preview, Company Name, Tagline, Primary Color picker
/help/account-settings/branding-settings.png
Upload Your Logo
Add your business logo to appear on all invoices. Supported formats: PNG, JPG, SVG (max 5MB).
Best Practices:
- • Use a square or horizontal logo (300x300px minimum)
- • Transparent background works best (PNG format)
- • Keep file size under 1MB for faster loading
Brand Colors
Choose your primary and secondary brand colors. These colors will be used for:
- Invoice headers and accents
- Buttons and call-to-action elements
- Table headers and dividers
Company Information
Add your business details to automatically populate on all invoices:
- Company Name
- Tagline (optional)
- Business Address
- Phone Number
- Website URL
Note: Branding settings are available for Supporter and Champion plan subscribers. Free plan users can use the default template without custom branding.
Saving & Sending Invoices
Once you've filled in all the details, you can save your invoice as a draft or send it directly to your client.
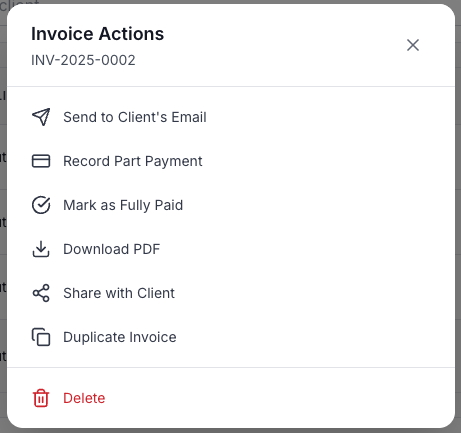
Save as Draft
Save your invoice without sending it. Drafts are stored in your account and can be edited anytime before sending.
Perfect for invoices you're still working on or need approval for before sending.
Send Invoice
Send the invoice directly to your client via email. The email includes:
- A link to view the invoice online
- PDF attachment (automatically generated)
- Payment instructions
- Your contact information
💡 Email Sending
Emails are sent from noreply@freelancetrackr.online with your name and invoice details. Clients can reply directly to your email address.
Download PDF
Generate and download a PDF version of your invoice for:
- Sending via external email or messaging apps
- Printing physical copies
- Attaching to proposals or contracts
- Archiving for your records
After Sending
Once sent, the invoice status changes to "Sent" and you can:
- Track when the client views the invoice
- Send payment reminders
- Mark as paid when payment is received
- Download receipts
Invoice Lifecycle:
Next Steps
Now that you know how to create invoices, explore these related guides:
Still have questions?
Contact Support